Whether you're hosting a party or just looking for a delicious snack, coxinha is a satisfying treat perfect for any occasion. With its crispy crust and savory, creamy filling, it is sure to impress anyone who tries it.
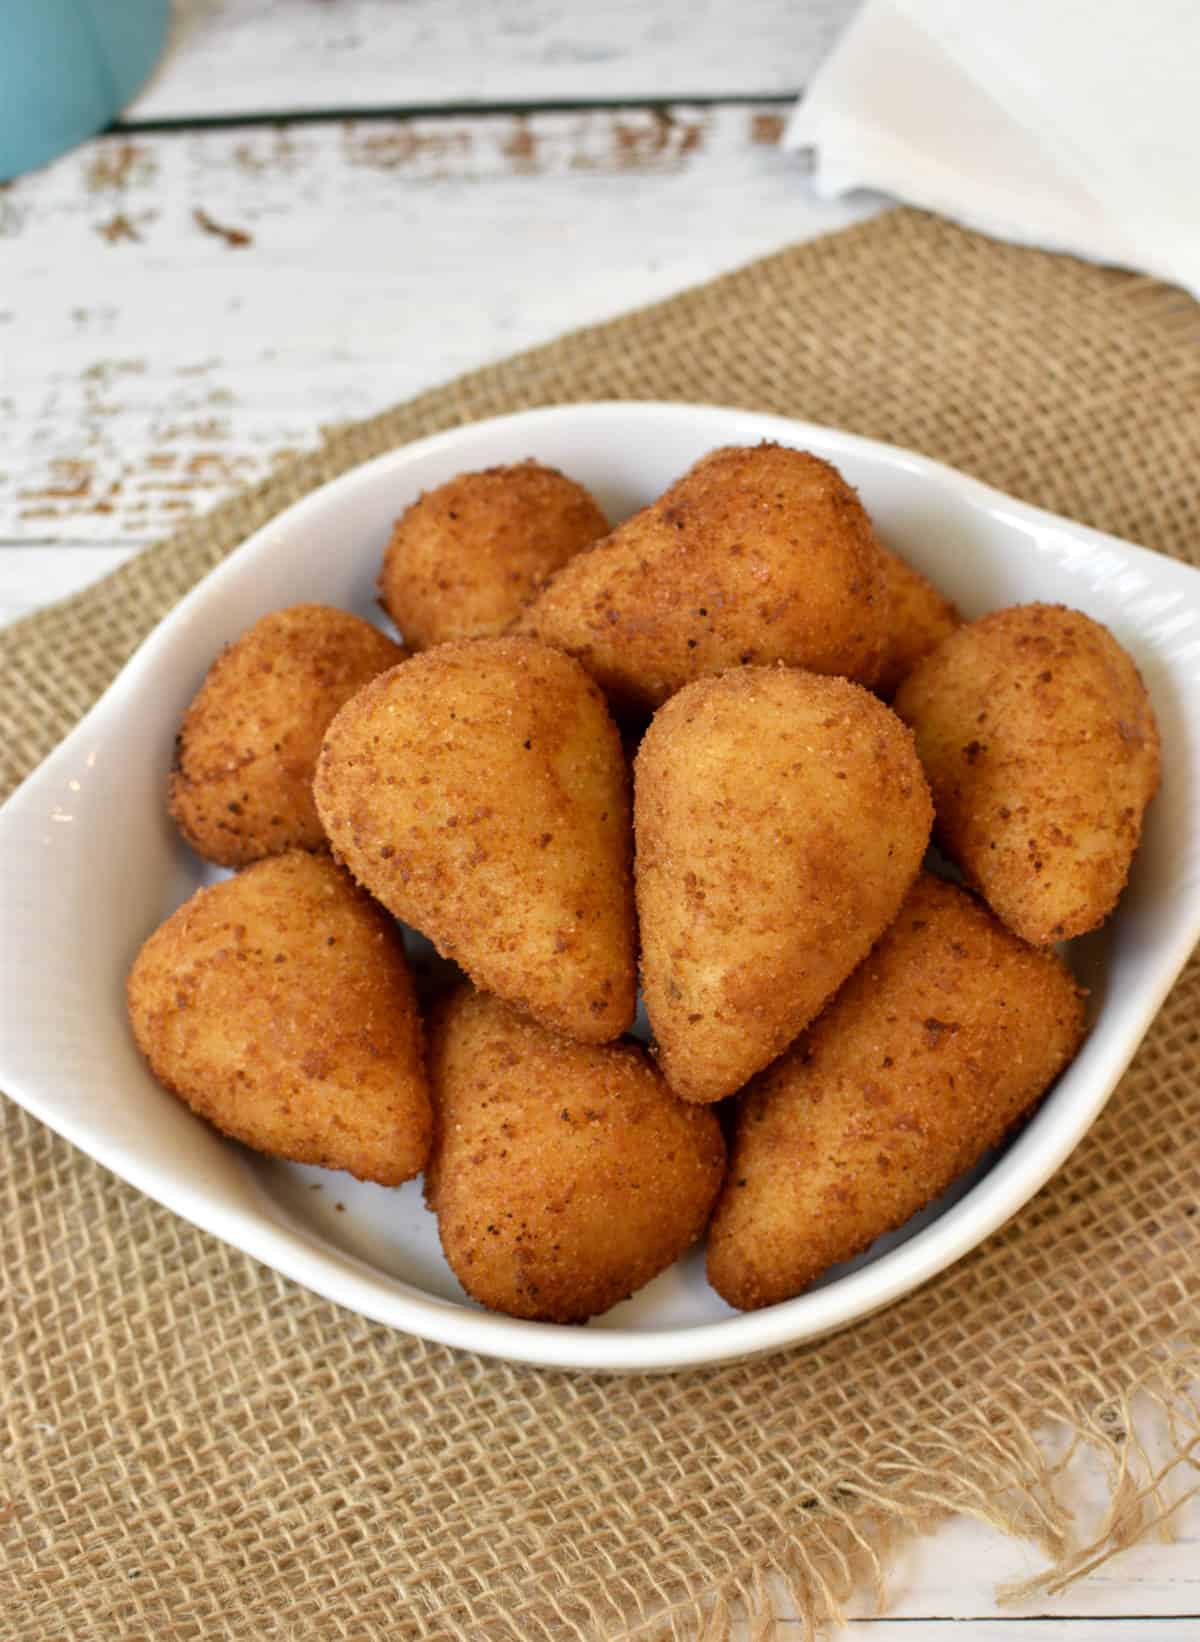
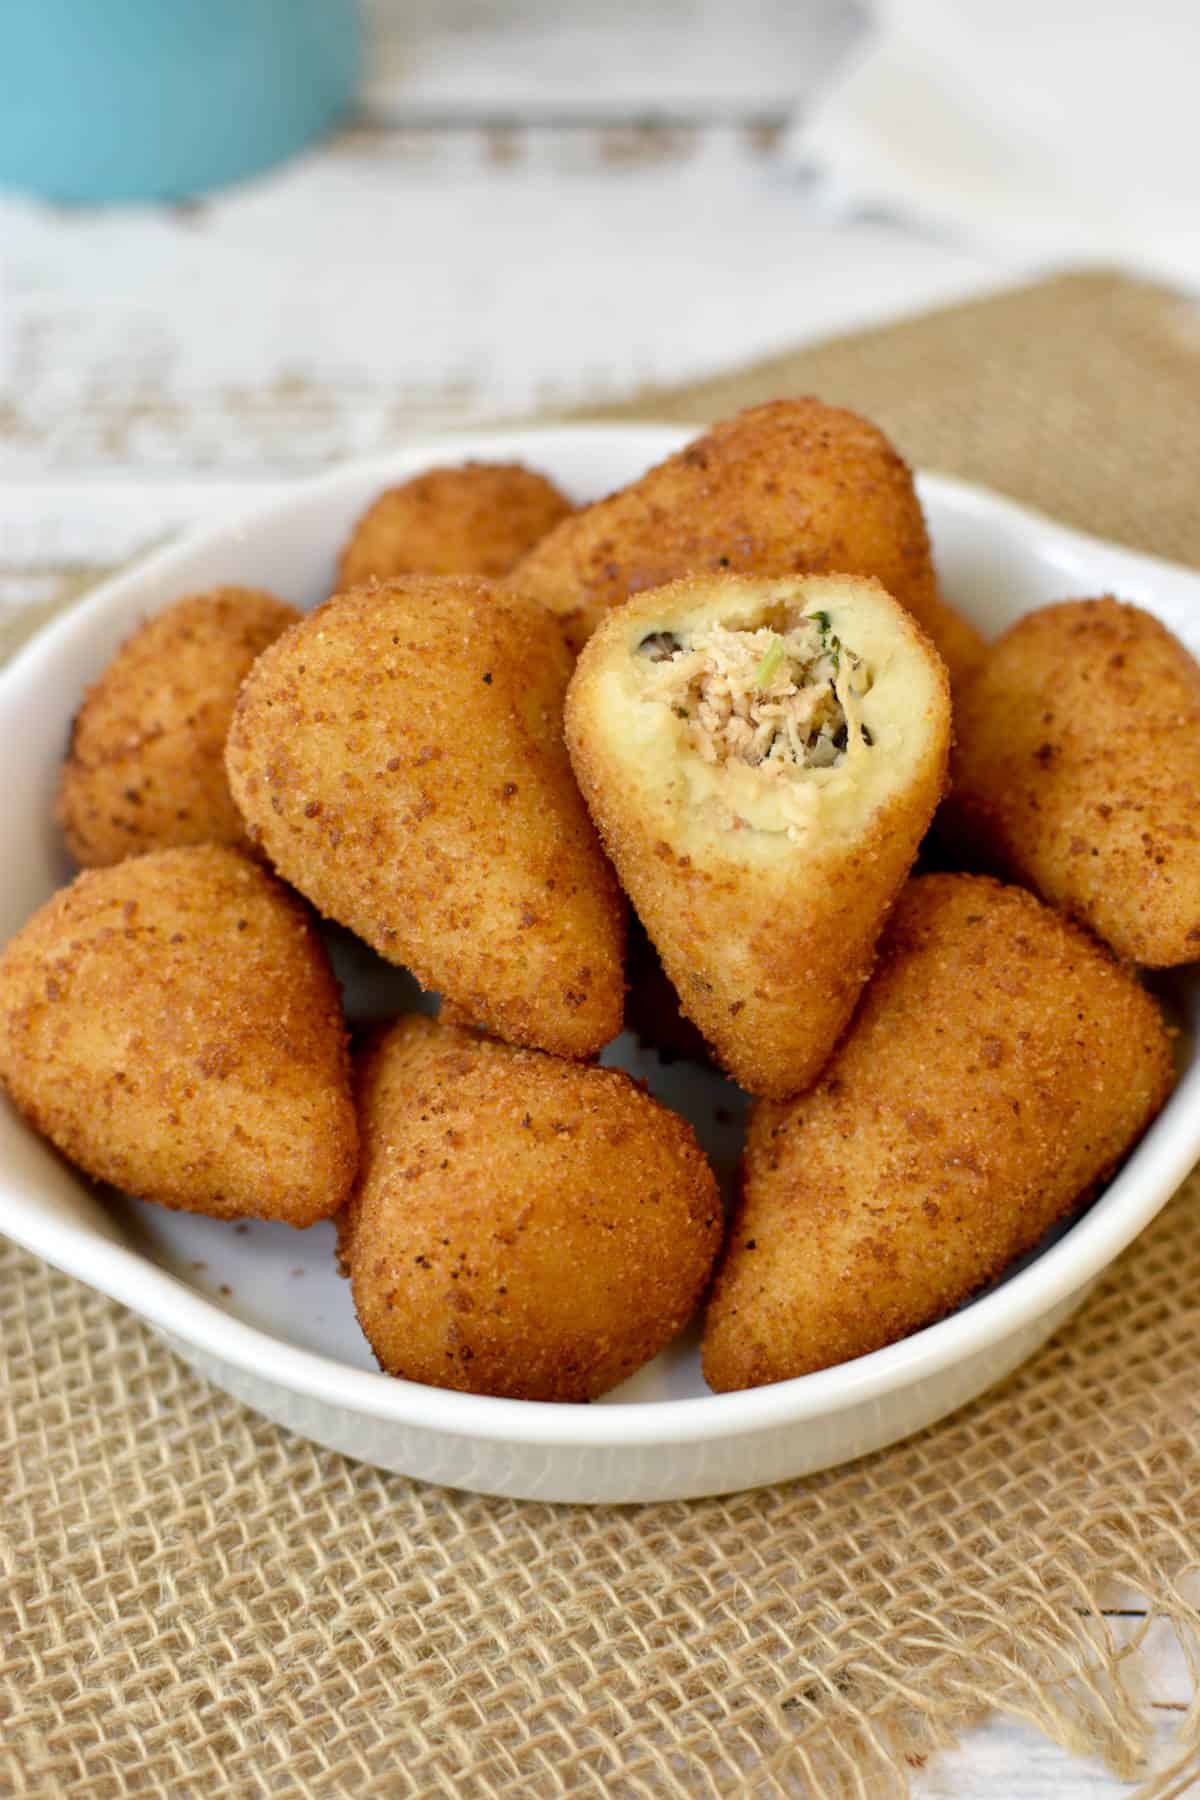
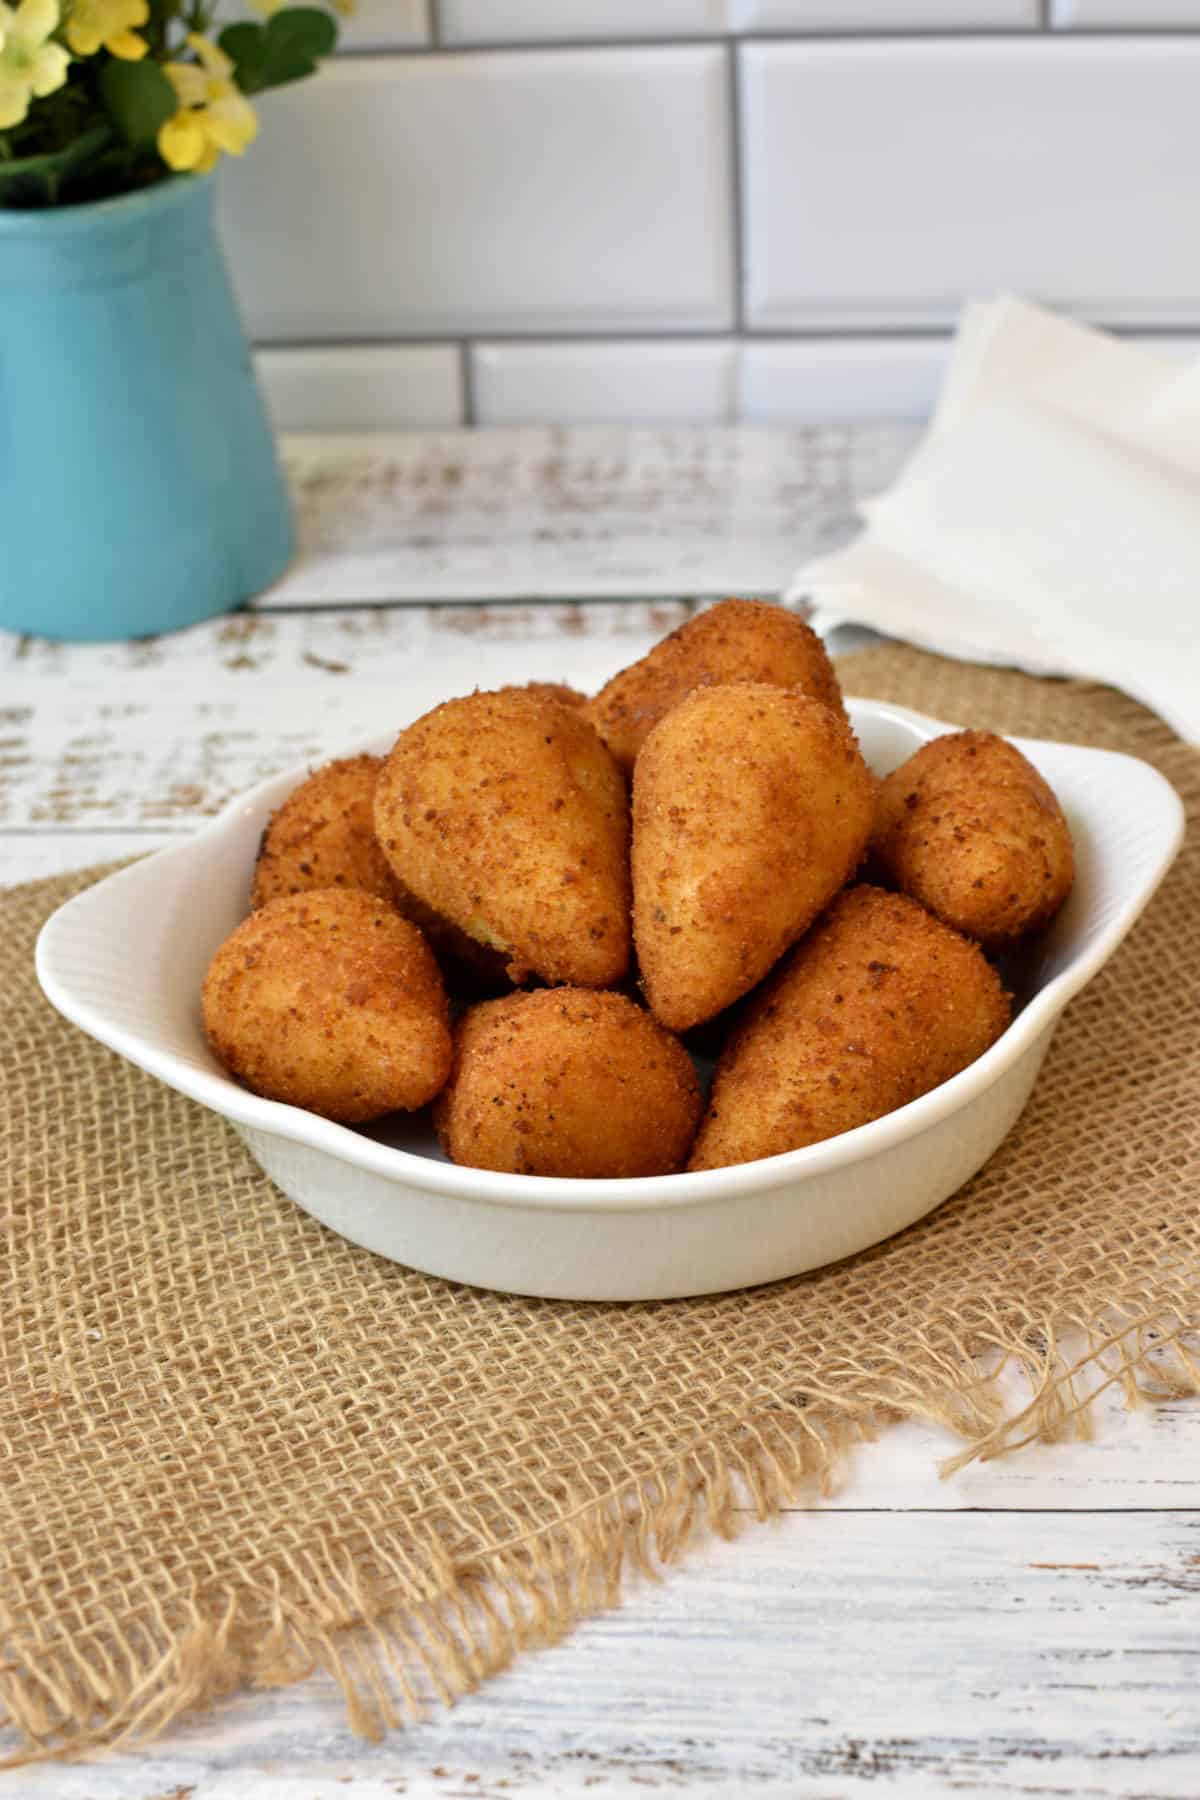
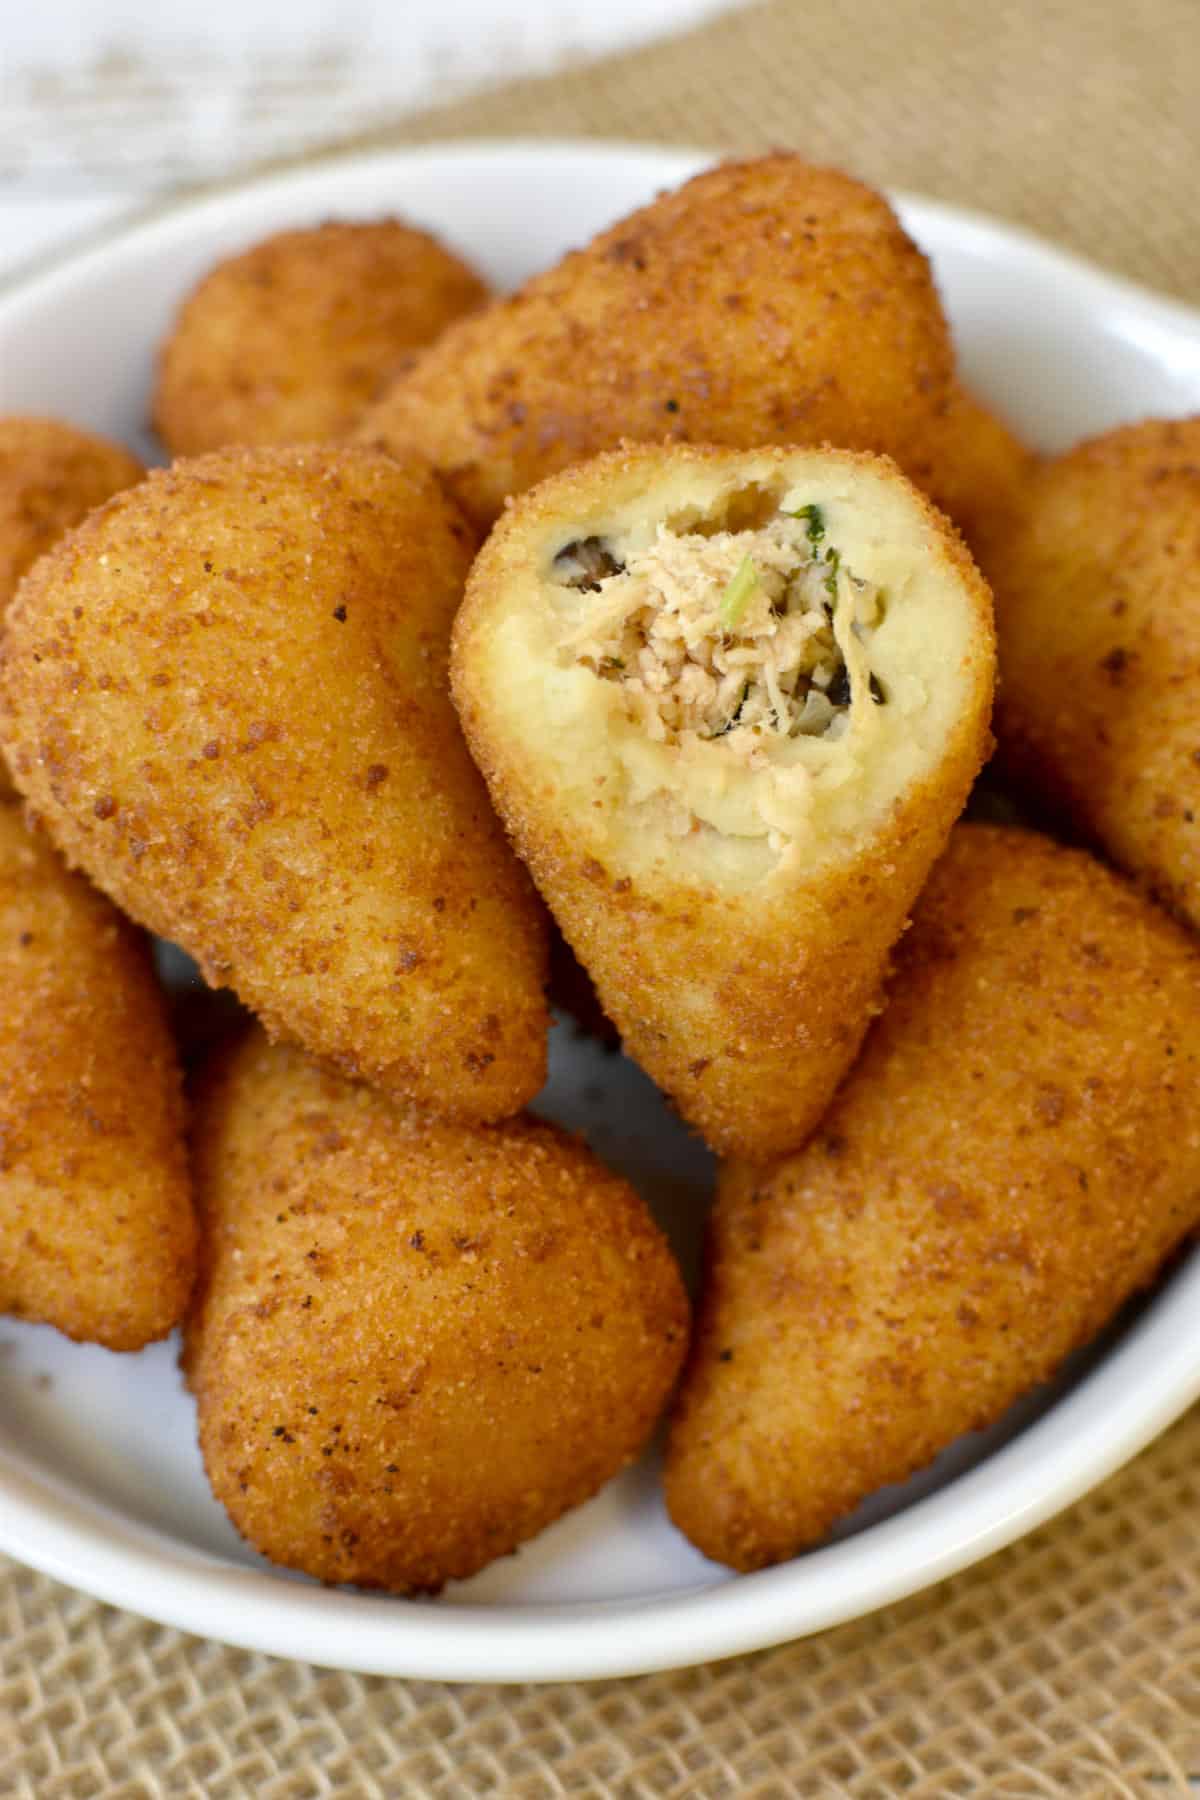
Coxinha, pronounced (koh·sheen·yuh), is a famous Brazilian snack that's loved for its delicious taste and unique shape. It's a deep-fried dough filled with well-seasoned shredded chicken that's incredibly satisfying.
In Brazil, this tasty appetizer is a staple at birthday parties, weddings, baby showers, family and friends gatherings, bars, and even on the streets, sold by street vendors. Coxinha is so delicious that any time is a good time to have it.
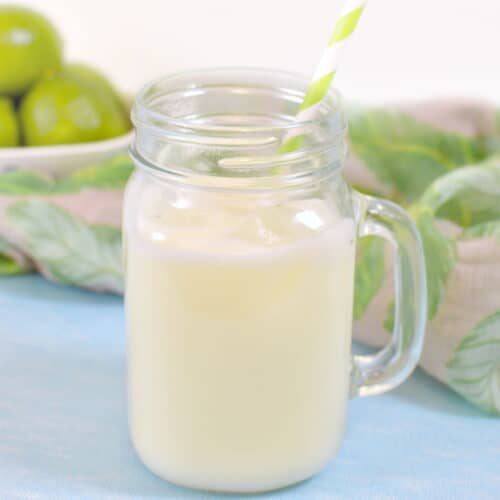
By the way, if you're planning a party or a nice gathering, don't forget to check out my recipe for brigadeiros (Brazilian chocolate fudge balls); they're a very traditional party treat. Also, the Brazilian lemonade is always a hit at any party!
Jump to:

What is coxinha
Coxinha is made using a dough made of wheat flour, chicken broth, milk, oil, egg yolk, and salt. The dough is cooked in a pan and filled with deliciously seasoned shredded chicken.
Once the coxinhas are filled, they are shaped into the familiar teardrop shape and coated in breadcrumbs before being fried until golden brown and crispy.
The origin of coxinha
A commonly accepted origin story is that coxinha was invented in the 19th century in São Paulo during the Industrial Revolution. The story goes that workers in the factories and industries needed a portable and filling snack they could eat on the go. Hence, a local cook came up with the idea of creating a small, portable snack made from shredded chicken and dough that could be easily eaten with one hand.
The snack quickly became popular among workers and soon spread throughout Brazil. Today, coxinha is a beloved snack and can be found in many street vendors, bars, and restaurants throughout the country.
Ingredients
Dough:
- Flour
- Chicken broth
- Milk
- Oil
- Egg yolks
- Salt
Filling:
- Shredded chicken
- Olive oil
- Onion
- Garlic
- Tomatoes
- Olives
- Seasoning: Oregano, paprika, salt, pepper
- Chicken broth
- Parsley/Cilantro
- Cream cheese (optional)
Coating and frying:
- Egg whites + water
- Bread crumbs/Panko crumbs + salt
- Vegetable oil
*See the recipe card for quantities.
Instructions
For the filling
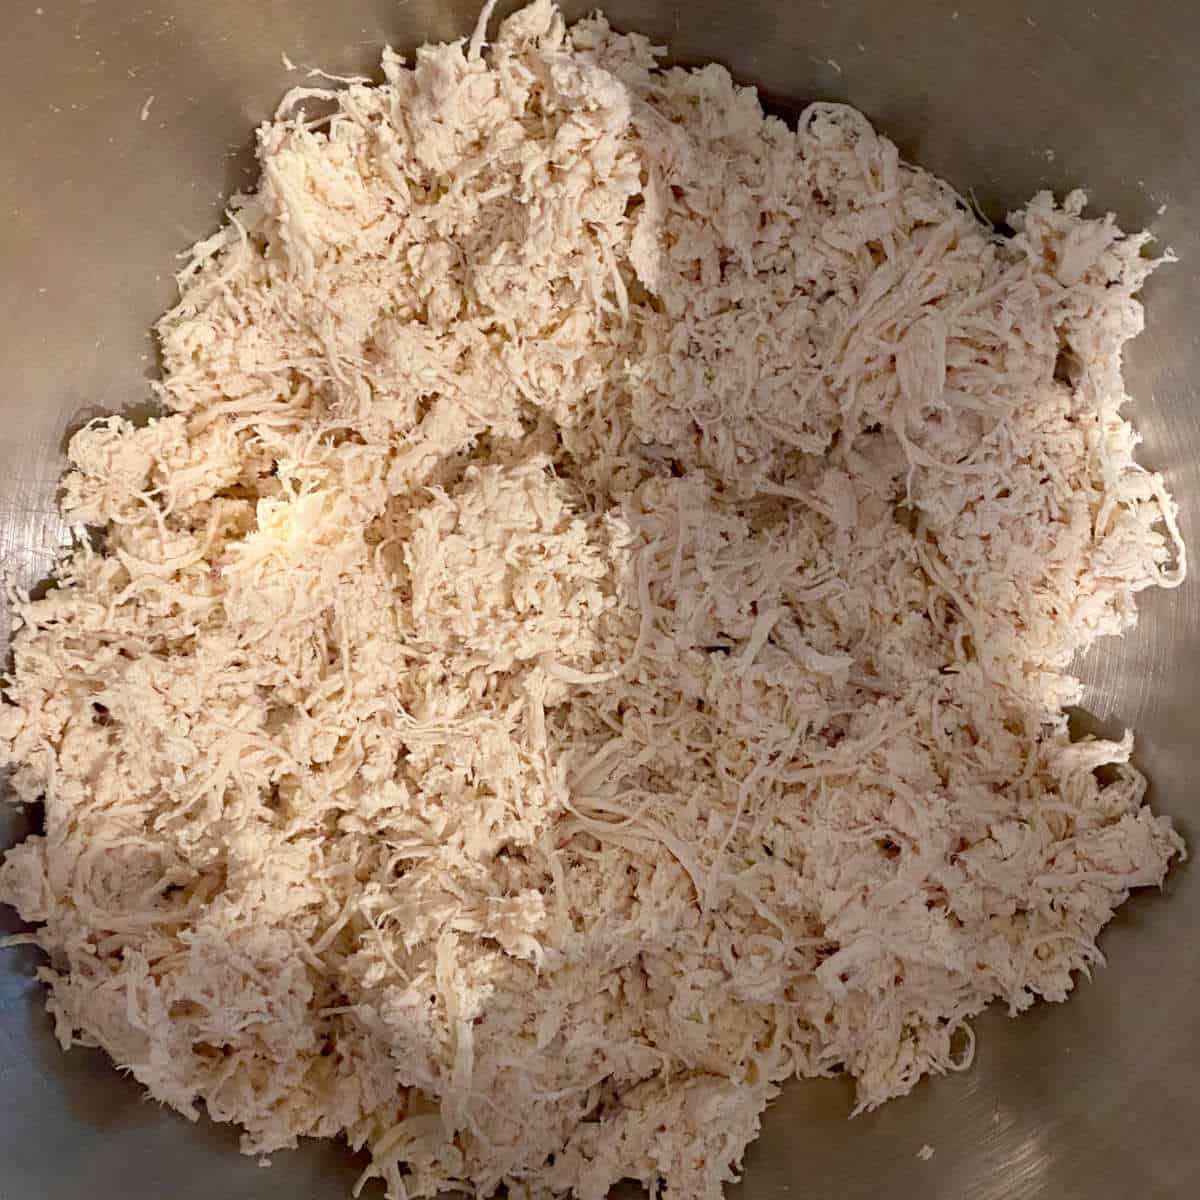
Cook 2 lbs (about 1 Kilo) of chicken breasts or buy a rotisserie chicken and shred them finely. Set aside.

In a large skillet, add olive oil and saute onion and garlic.

Add the chicken, seasonings, olives, tomatoes, parsley, chicken broth, and cream cheese (optional)

Mix everything until well combined.
For the dough
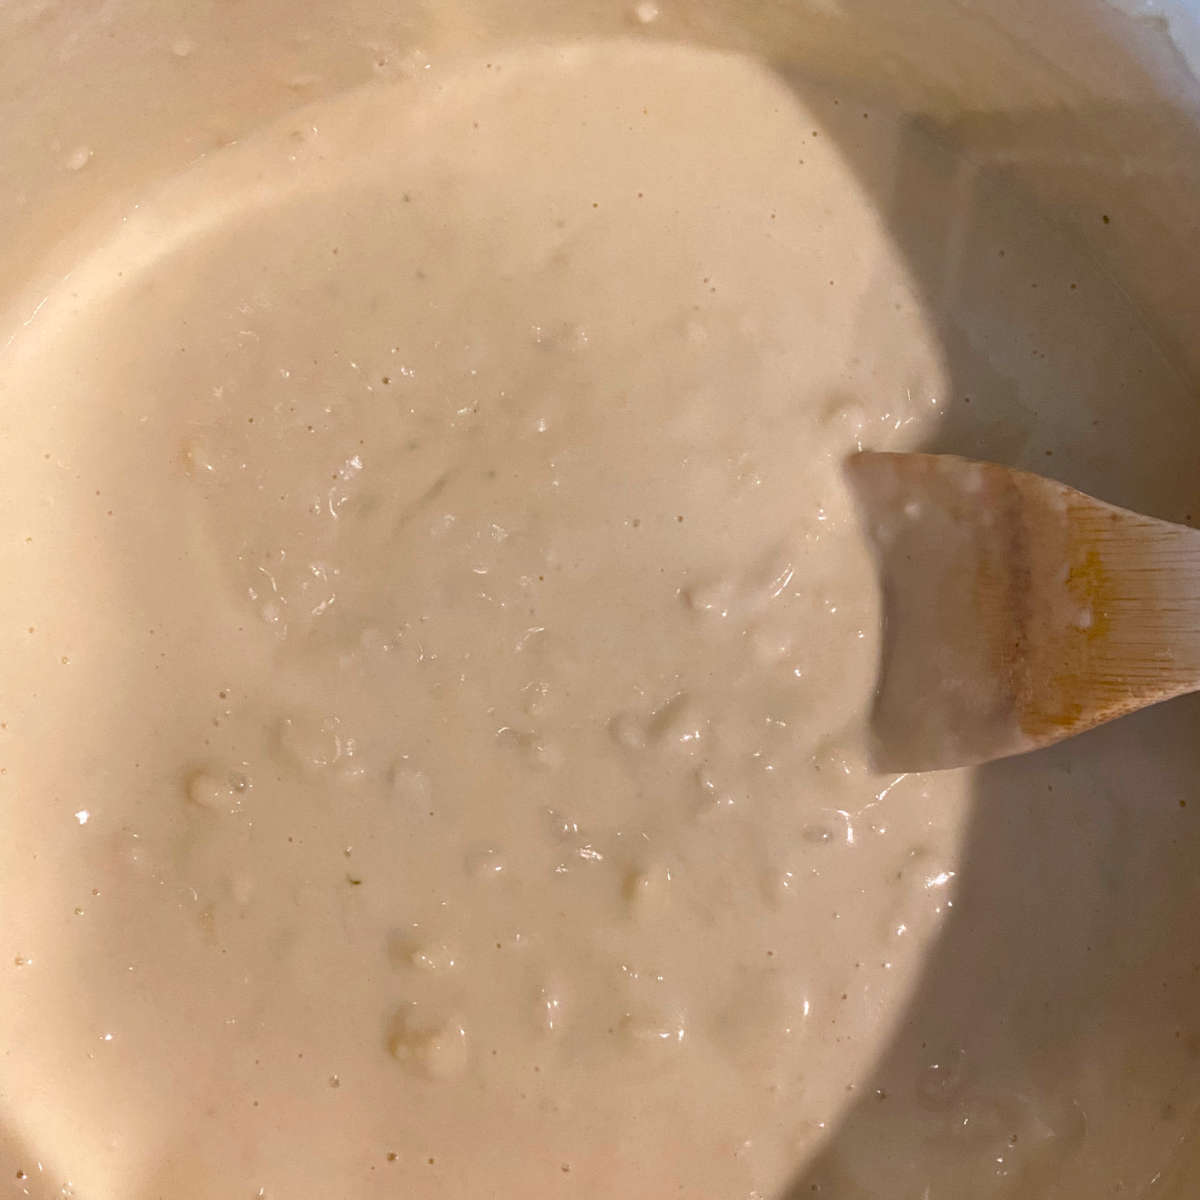
Add wet ingredients and bring them to a simmer. Add flour and salt, reduce the heat to low, and stir to combine.

The mixture will start to become very lumpy. Continue to mix, scraping the bottom and sides of the pan.

Keep stirring constantly until the mixture forms a ball of dough.
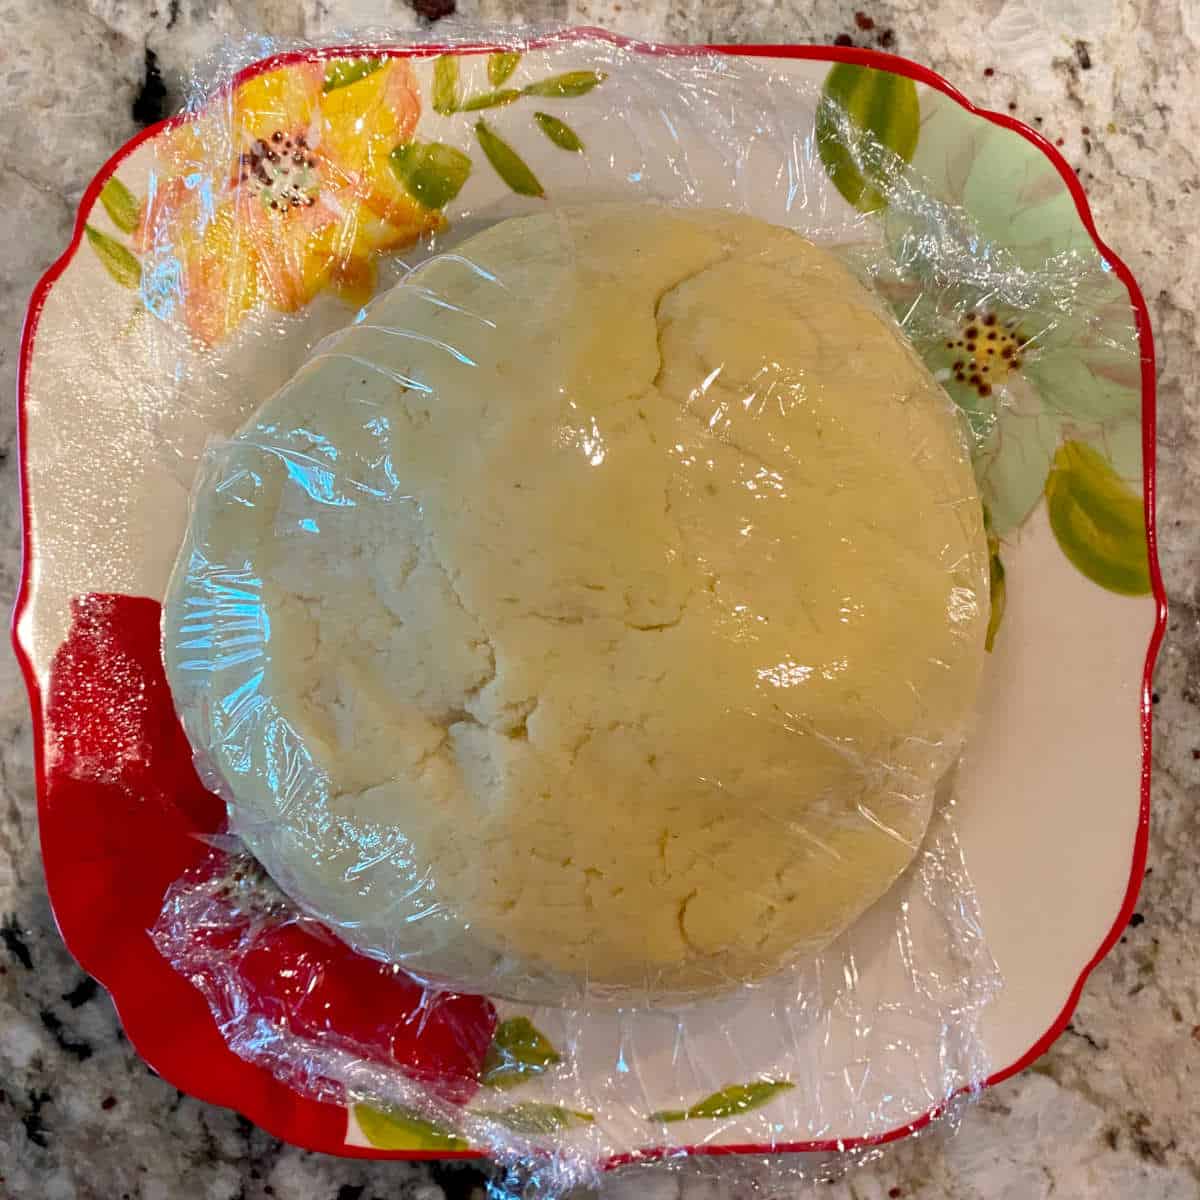
Remove the dough from the heat and let it cool slightly. Knead it for just a few minutes until it becomes smooth and uniform.
Assembling the coxinhas

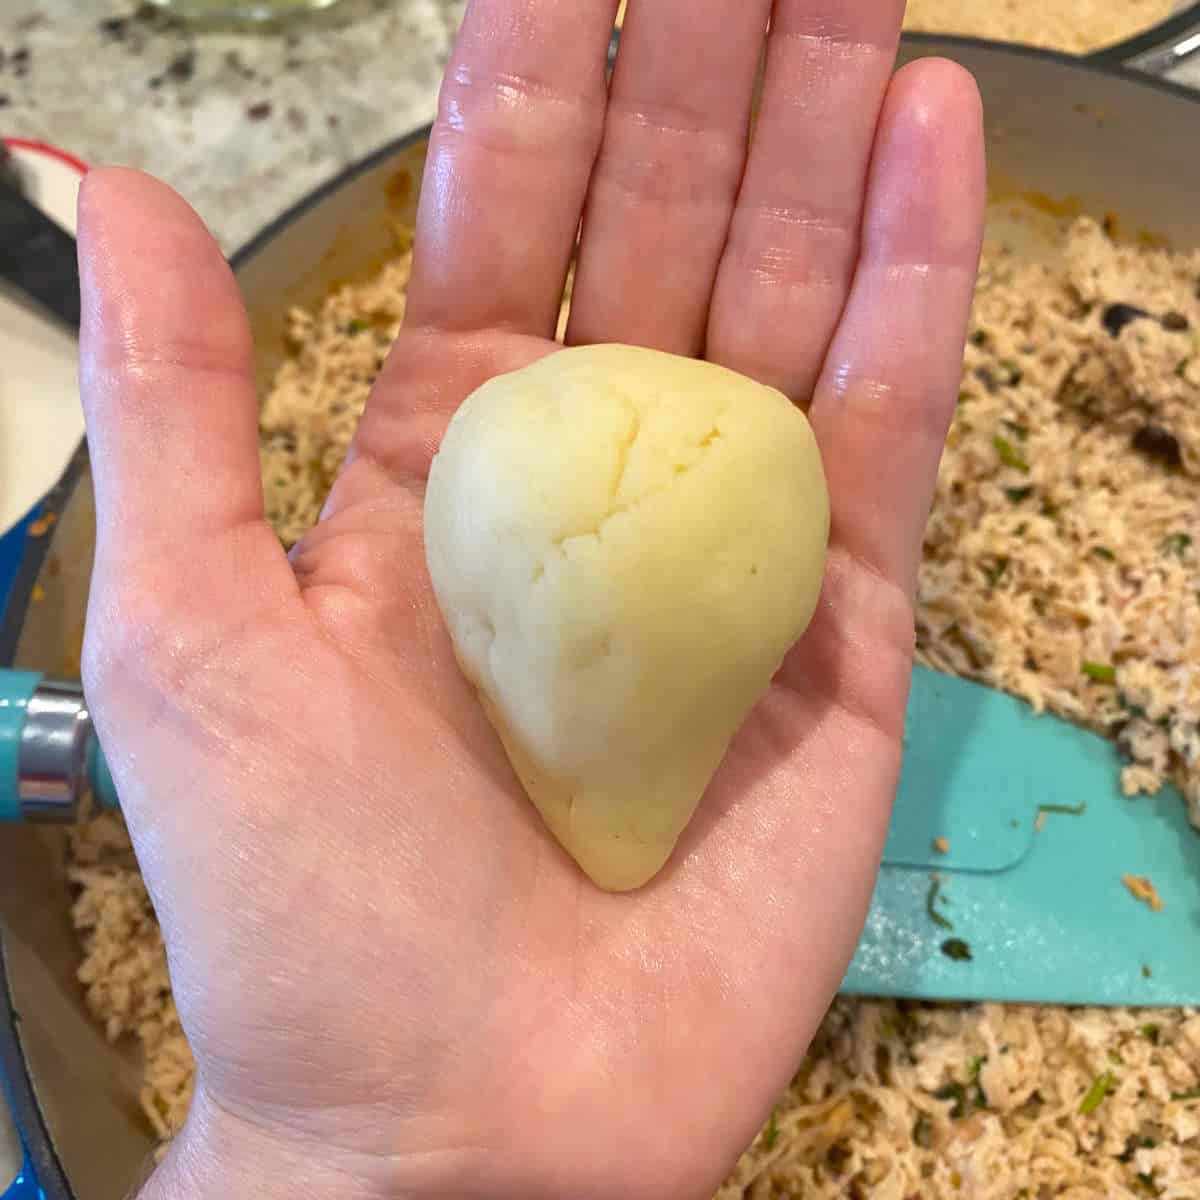
Open a ping-pong ball-sized portion of dough in the palm of your hand.

Add filling in the center of the dough and close, bringing the edges together with your fingers towards the center.
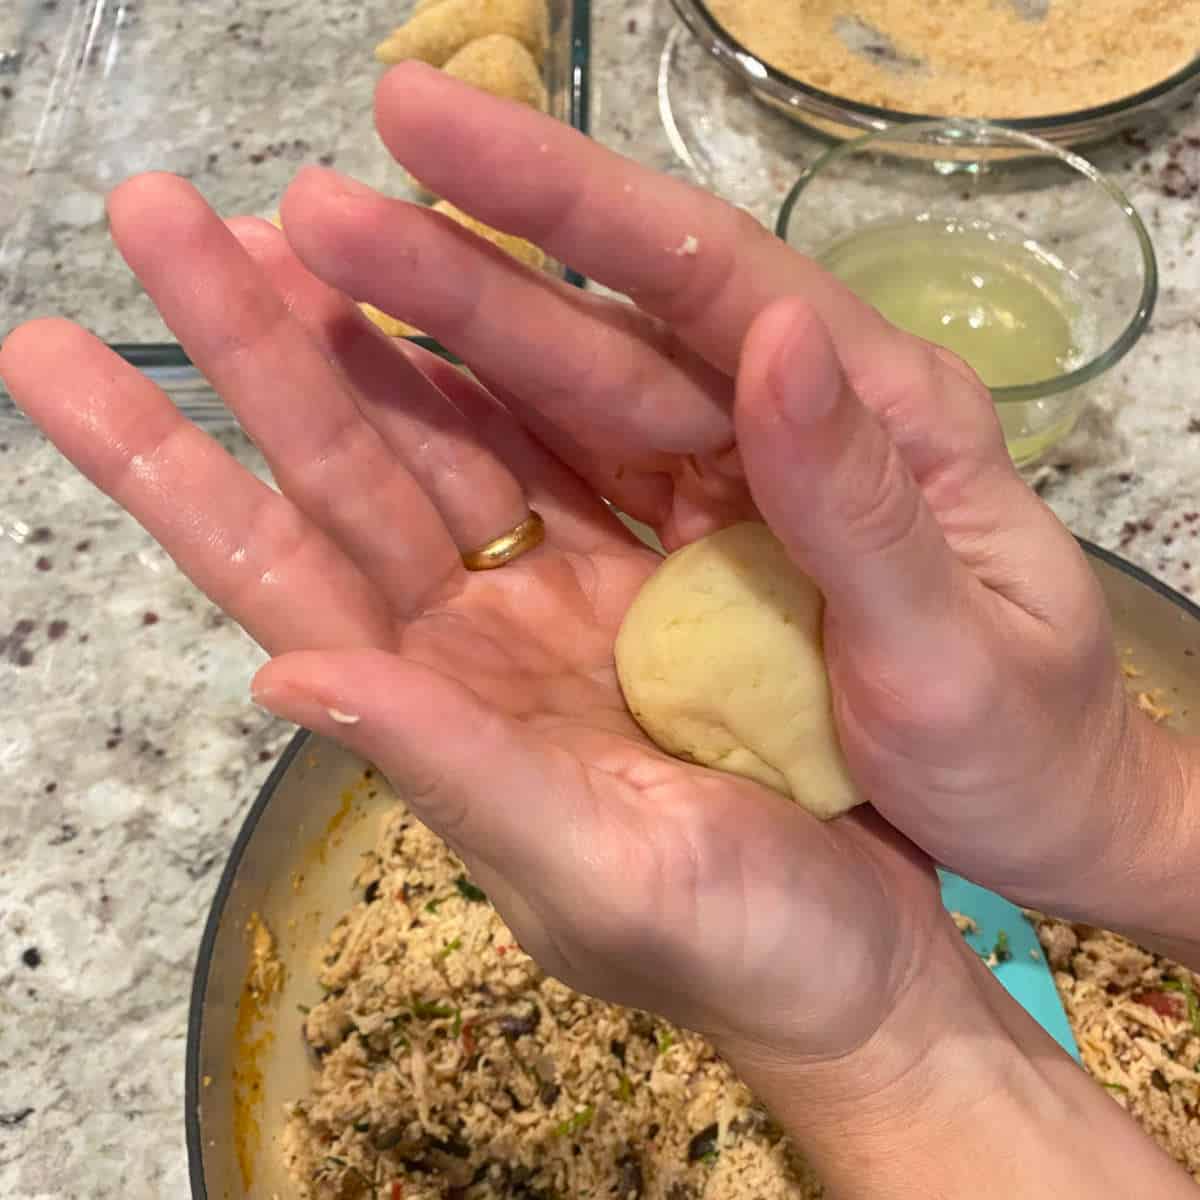
Shape the dough into a teardrop between the palms of your hands.
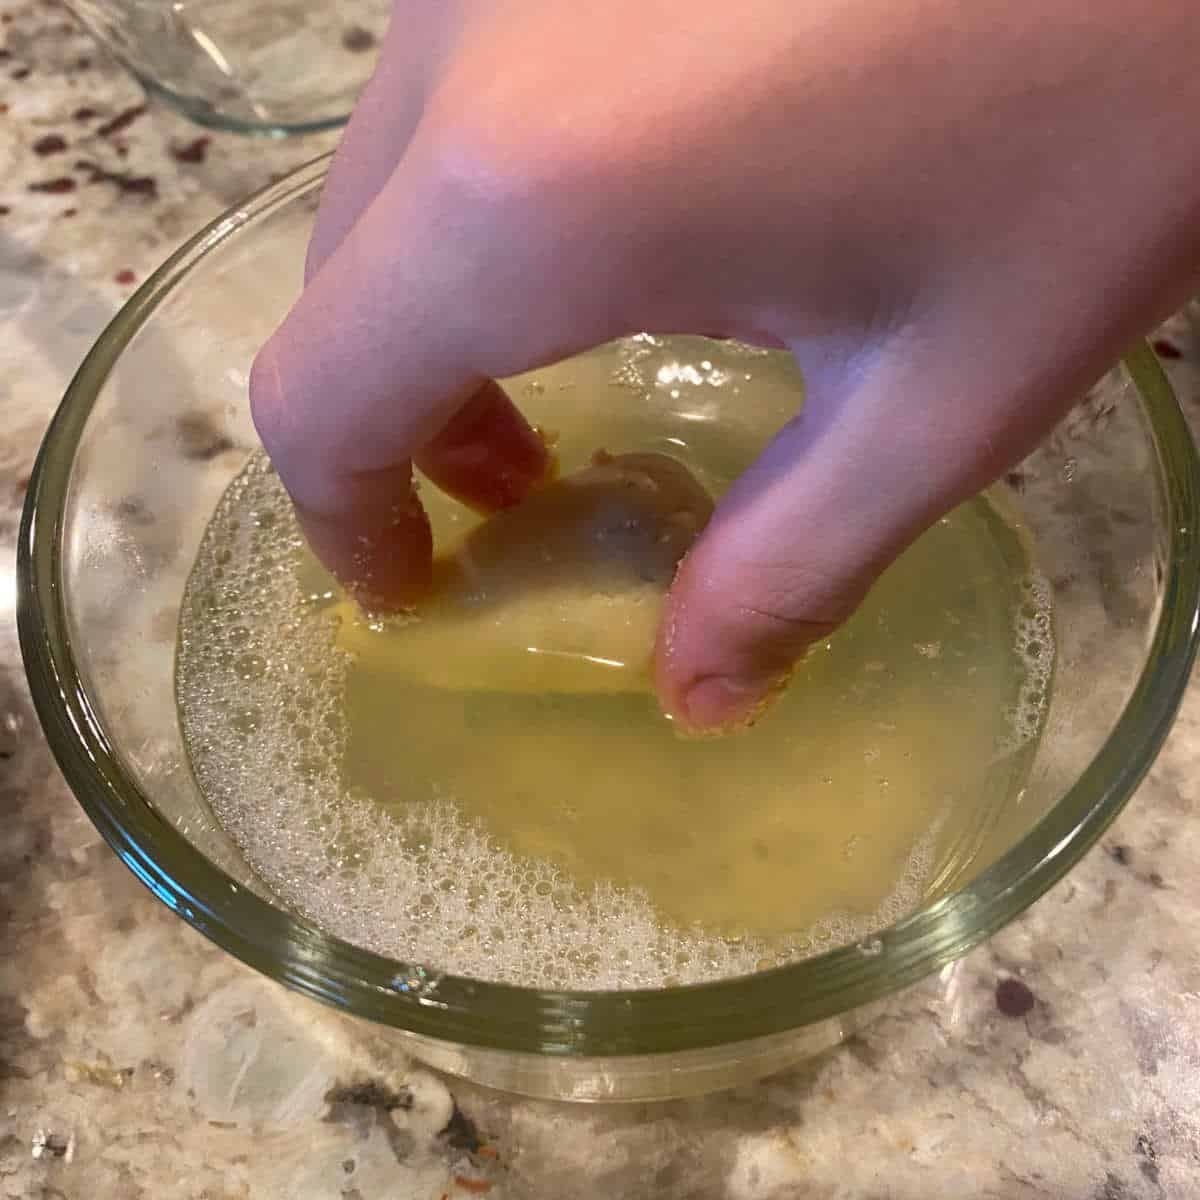
Dip it in the egg white wash.

Roll the coxinhas on breadcrumbs.
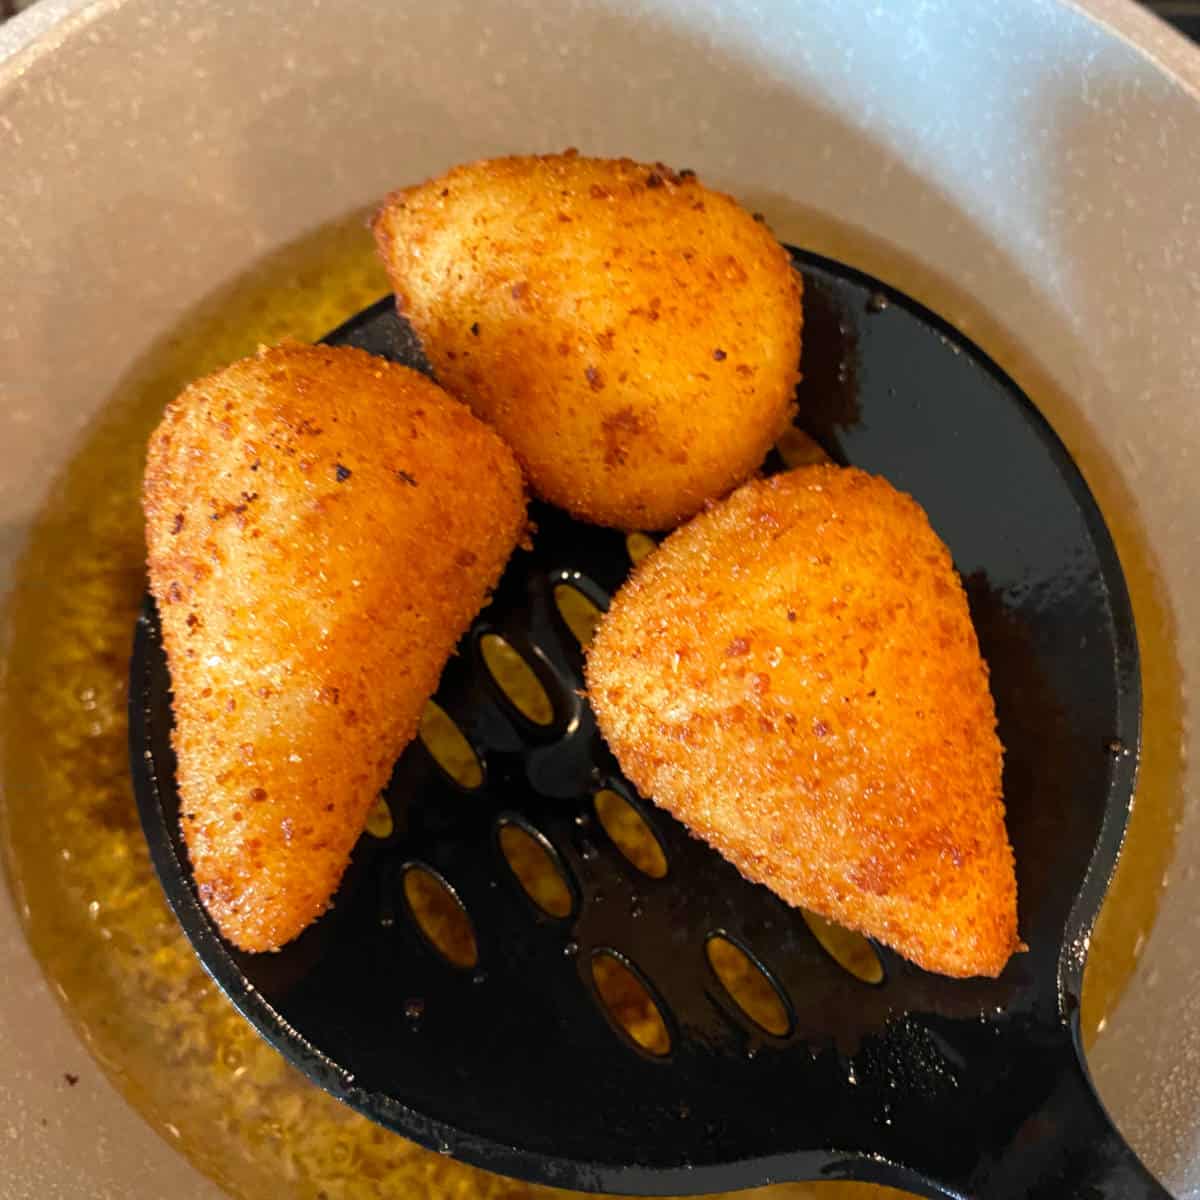
Fry them in vegetable oil until golden brown.
*For detailed instructions, check out the recipe card.
Top tips for amazing coxinhas
- Be careful not to open the dough too thin on your hand, or it might tear.
- Try finding the right balance between the dough and the filling. When too much filling is added, it's hard to close and easier for the dough to tear.
- You can make small, medium, or large coxinhas as needed.
- If cooking the chicken yourself, use a flavorful broth or stock, rather than just plain water, to infuse it with more taste.
- Don't skimp on the garlic, onion, salt, and spices. They are necessary to give the coxinha its traditional taste.
- If frying previously frozen coxinha, make sure that there are no ice crystals on them before frying, as it could result in oil splattering and possible burns.
- Use enough oil to cover the coxinhas.
- Choose a neutral vegetable oil to fry them, such as canola, soybean, or corn oil. They have a high smoke point and a subtle taste.
- Fry them in small batches to prevent them from getting too oily. I usually fry 4-5 at a time, and each batch will take roughly 2 minutes to fry.
Cooking chicken breasts
Here's a fast way to do it if you want to cook your own chicken instead of shredding rotisserie chicken.
- Add 2 pounds of chicken (about 1 kilogram) into a pressure cooker (I like using Instant Pot) and add enough chicken broth to barely cover them. Add some extra salt, about 1 teaspoon should be good, and cook them on high pressure for about 20 minutes. Manually release the pressure, and finely shred the chicken with a hand mixer or food processor.
Storage
Coxinhas can be stored in the refrigerator for up to three days or frozen for up to three months.
Can I freeze coxinha?
Yes, you can. To freeze coxinhas, place them on a baking sheet in the freezer, apart from each other so that they won't stick together. Once frozen, transfer them to a plastic bag, remove as much air as possible (sometimes I suck the air out using a straw), and keep them in the freezer for up to 3 months.
FAQs
Coxinhas are best reheated in the oven or air-fryer to keep their crunchiness. Place them on a baking sheet and reheat at 350ºF/180ºC for about 10 minutes or until hot again. If reheating from frozen, add about 5 more minutes, and ensure the center is defrosted and hot.
Yes, you can, although the outer crust will be a little dryer than the deep-fried version.
Spray the coxinhas with some oil spray. Place them in the air frier at 395ºF/200ºC for about 15 minutes or until golden brown, rotating them halfway during the process.
Related
Would you like more Brazilian recipes? Try these:


Don't miss a recipe! Subscribe to our newsletter.
📖 Recipe / Receita

Coxinha (Brazilian chicken croquette)
Ingredients
For the Filling
- 1 tablespoon olive oil
- 1 small onion, diced
- 5 garlic cloves, minced
- 5 cups finely shredded chicken
- ½ tablespoon oregano
- 1 teaspoon smoked paprika
- ½ teaspoon salt (or more, to taste)
- black pepper to taste
- 3 oz olives, chopped (your favorite, green or black)
- 14.5 oz can of diced tomatoes
- 1 cup cilantro, chopped
- ⅓ cup chicken broth
- ⅓ cup softened cream cheese optional
For the dough
- 5 cups all purpose flour
- 2½ cups milk
- 2½ cups chicken broth
- ½ cup oil
- 2 egg yolks (save the egg whites for dredging)
- 1 tablespoon salt
For dredging and frying
- 2 egg whites
- ⅓ cup water
- 2 cups plain breadcrumbs
- 1 teaspoon salt
- enough oil to deep-fry the coxinhas
Instructions
For the filling
- In a large skillet, over medium heat, add olive oil and saute onion and garlic.
- Add the shredded chicken, oregano, paprika, salt, pepper, olives, tomatoes, and chicken broth, and stir until well combined. If using cream cheese (optional) mix it in as well. Turn off the heat and add the cilantro.
For the dough
- In a big, heavy-bottomed pan, combine the chicken broth, milk, oil, and egg yolks, and bring it to a simmer over medium heat.
- Add the flour and salt, reduce the heat to low, and stir until the mixture thickens. It'll get lumpy and harder to stir, but keep stirring until it almost forms a dough ball. Remove the dough from the heat and let it cool slightly before handling.
- Transfer the dough to a silicone mat and knead it until it becomes smooth and uniform. It'll be just a few minutes.
To assemble the coxinha
- Mix the egg whites and water in a small bowl. Set aside.
- In another bowl, mix the breadcrumbs and salt.
- Now organize your working station with the dough, filling, bowl of egg wash, bowl of breadcrumbs, and an empty container to place the assembled coxinhas.
- Open a ping-pong ball-sized portion of dough in the palm of your hand. Flatten it into a disc, pressing the center with your thumb to create more space for the filling. Be careful not to open it too thin, or the dough might tear.
- Add filling in the center of the dough with a teaspoon and close it, bringing the edges together with your fingers.
- Shape the dough into a teardrop by rolling it between your hands (check photos in the image instructions). Repeat this process until all the dough is gone.
- With one hand, dip it in the egg white wash, draining any excess from the dough. With your other hand, roll the coxinhas in the breadcrumbs. Repeat this process with all the coxinhas.
- When it's time to fry them, heat oil in a small-medium pan, enough to cover about 4-5 coxinhas. Touch the tip of one coxinha in the hot oil; if it starts to bubble, it's hot enough. Add about 4-5 coxinhas and fry them until golden brown.
- Place them on a serving plate lined with a paper towel to absorb excess oil. Eat it while still hot.
Notes
Sharing is caring
Nutrition Estimate:
Nutritional disclaimer
All nutritional information above is based on third-party calculations and should be considered estimates. Nutritional content may vary according to brands used, measuring methods, portion sizes, substitutions, optional ingredients, etc. Simple Living Recipes is not responsible for any miscalculation or misinformation in the nutrition label.
Pairing
These are also my favorites to serve for a gathering:


Follow us on Social Media!
If you'd like to know more about traditional food from Brazil, check out this post with the 50 most popular Brazilian food.
Save this to your Pinterest

Food safety
- Cook to a minimum temperature of 165 °F (74 °C);
- Do not use the same utensils on cooked food that previously touched raw meat;
- Wash hands after touching raw meat;
- Don't leave food sitting out at room temperature for extended periods;
- Never leave cooking food unattended;
- Use oils with a high smoking point to avoid harmful compounds.
- Always have good ventilation when using a gas stove.


Comments
No Comments