These 3-ingredient shortbread cookies are so good! They melt in your mouth and are gluten-free. You can make them for an afternoon snack or to give as a gift to family and friends. Everyone will love them!

I think I'll start this post with everything I like about these cookies.
- You'll use just 3 simple ingredients that you probably already have in your pantry.
- They are super easy to make. No need for a mixer.
- They are naturally gluten-free, so no special flours are required.
- The taste is great, and they melt in your mouth.
- They are very versatile, being perfect to give away on Christmas or any other special occasion.
- It's a great recipe to make with kids and have fun baking together.

Ingredients
These cookies require just 3 ingredients:
- Cornstarch
- Sweetened condensed milk
- Butter
*Decorative sprinkles are optional.

How to make
These 3-ingredient shortbread cookies are super easy to make. You just mix everything, mold, and bake.
Here are some photos and tips so they can come out great every time.


Tips
Soften butter
It's important to soften the butter so it's easy to mix and the dough gets to the right consistency.
To ease the process, you could slice the butter stick into fine slices and leave them on the countertop to soften. Some people like to use the microwave for it, but you have to be very careful, as it often ends up melting the butter, and we don't want it liquidy.
If you'd like more ideas on how to soften butter, here are some more ideas.
Refrigerate the dough
Refrigerating the dough for 20-30 minutes before baking helps prevent these cookies from spreading too much in the oven. Because this recipe has no flour or eggs, the structure of the cookie depends almost entirely on the butter and cornstarch. If the butter is too soft (not the right temperature) or the kitchen is warm, it melts too quickly, and the cookies flatten out. Chilling the dough slightly firms up the butter, helping the cookies hold their shape while they bake.
Check on them closely
If you'd like the cookies to be crunchy on the outside and soft on the inside, remove them from the oven before they brown on the bottom (in my oven, it was around 9 minutes). But if you like them all crunchy, then bake until lightly browned underneath. Don't let them brown too much, as the cookies start to get too dry.
How to Customize them
These 3-ingredient shortbread cookies aren't just delicious but also highly customizable. Here are some ideas on how you could customize them.
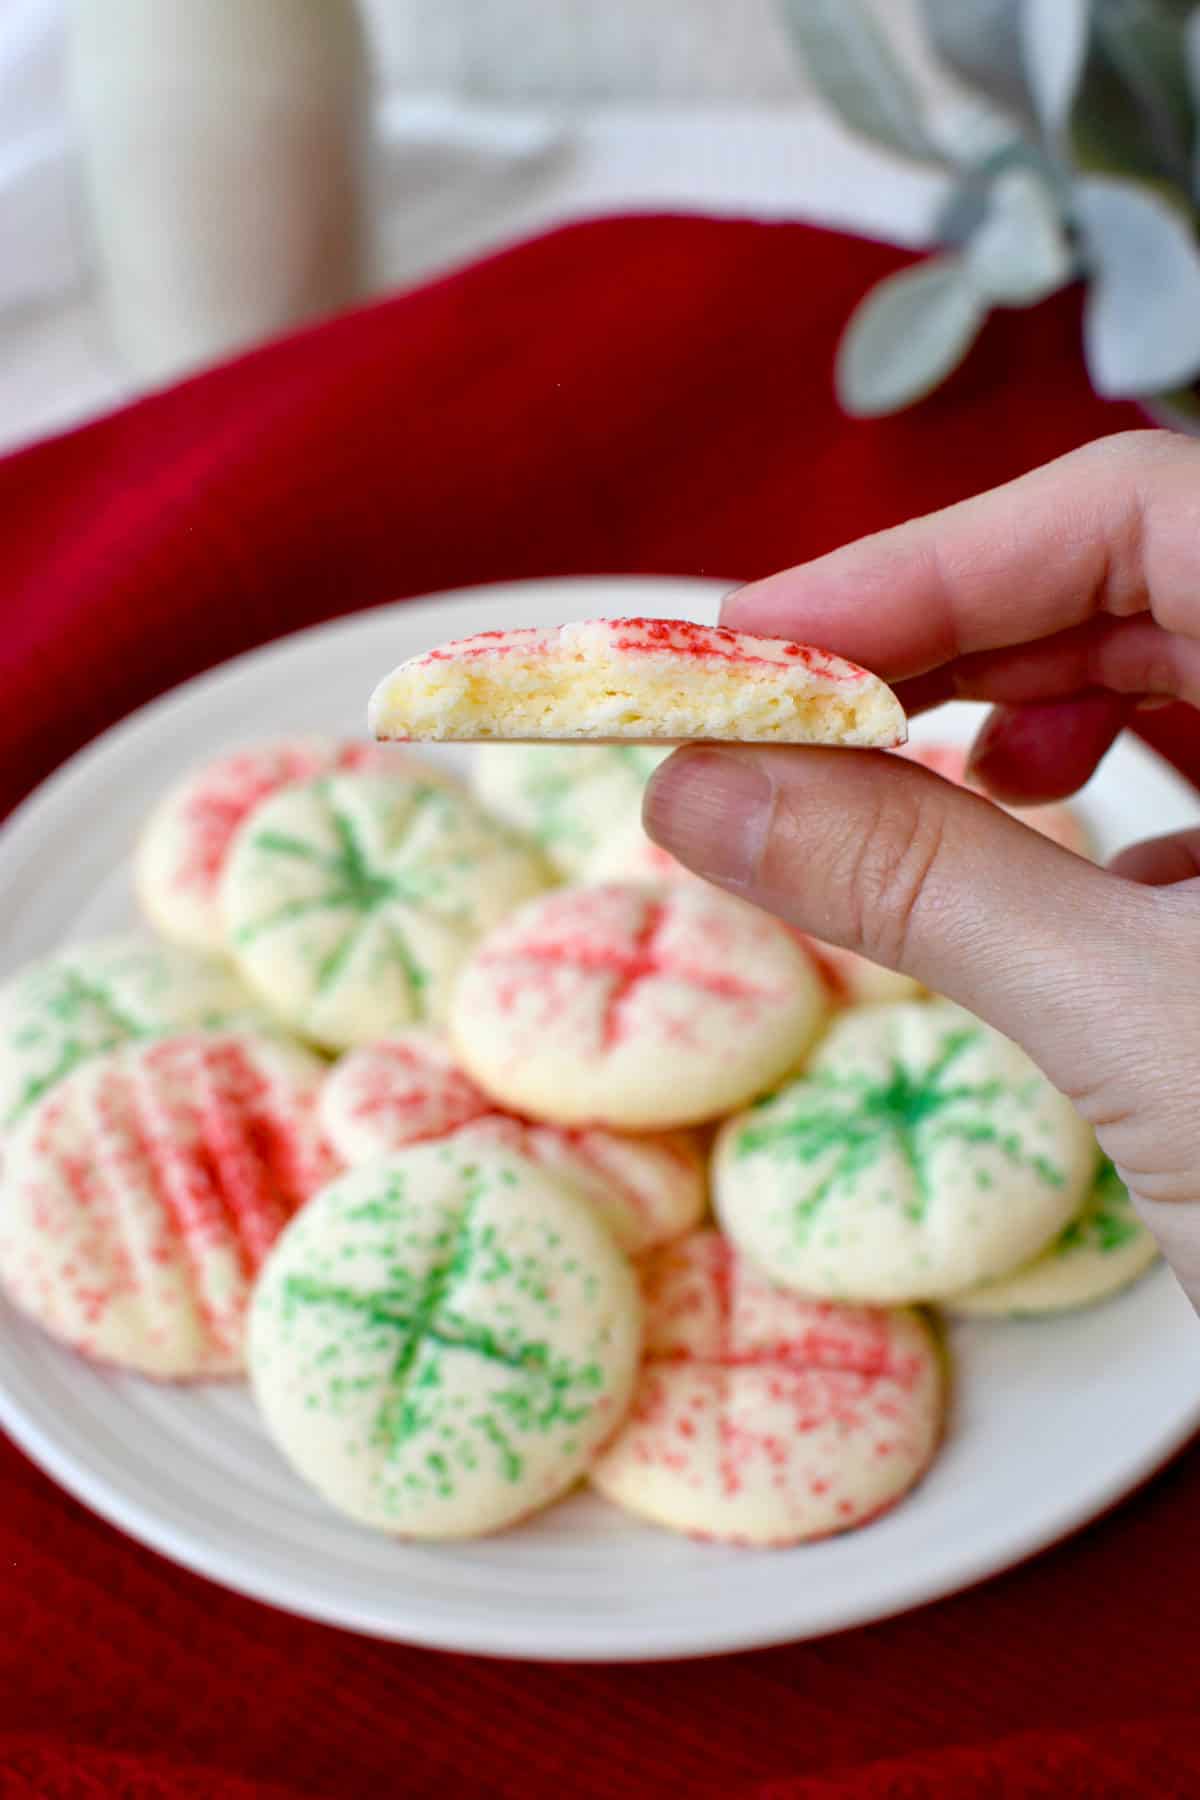
Christmas: If you want to make them as Christmas shortbread cookies, you could sprinkle green and red decorative sugar or sprinkles. Place them in a nice box, tin, or in a bag, tied with a pretty ribbon, and give them to family and friends.
Easter: For Easter, you could sprinkle pink and yellow decorative sugar or sprinkles. You could also dip them in chocolate.
Any occasion: You can customize them as you like, adding vanilla, lemon/orange zest, spices, or dipping in chocolate. Feel free to use your imagination! Place them in cellophane bags, tied with pretty ribbons and little messages. Tins are also a great option. Use your creativity, and I'm sure everyone will like it.

FAQs
Store cookies in an airtight container. They don't need refrigeration.
Yes!! They freeze well. You can wrap the raw dough in plastic wrap and place it in the freezer for up to 3 months.
When you're ready to use, place the dough on the counter or in the fridge until completely thawed.
Shape and bake them as usual.

Do you like simple recipes? Check out these ones...
Don't miss a recipe! Subscribe to our newsletter.
📖 Recipe / Receita

3-Ingredient shortbread cookies
Ingredients
- 9.5 oz cornstarch (270 grams)
- 7 oz sweetened condensed milk (200 grams / ½ can)
- 4 oz softened butter (salted) (½ cup / 110 grams)
Optional
- Decorative sprinkles, orange/lemon zest, spices...
Instructions
- Preheat oven to 350ºF. In a bowl, add condensed milk and softened butter. Mix well until it turns into a smooth cream. Add cornstarch and mix with a spatula. When it starts to get difficult to mix with the spatula, use your hands. Mix until it forms a very soft dough. (If you wish to use lemon or orange zest, add it with the cornstarch). Refrigerate for 30 minutes.
- Take small portions and roll by hand. Place on a baking sheet (no need to grease) about 2" apart, and lightly press them with your hand. Make the design you want. The most common is pressing the dough with the back of a fork. I also like using a butter knife and pressing to form a cross or asterisk. If you want to decorate with sprinkles, you can do it now.
- Bake for 9-11 minutes, more or less, depending on your stove and your preference. If you like the cookies crunchy on the outside and soft on the inside, remove them from the oven before browning underneath. But if you like it all crunchy, bake until lightly browned on the bottom. Don't let it brown too much as the cookies start to get too dry.
Notes
Sharing is caring
Nutrition Estimate:
Nutritional disclaimer
All nutritional information above is based on third-party calculations and should be considered estimates. Nutritional content may vary according to brands used, measuring methods, portion sizes, substitutions, optional ingredients, etc. Simple Living Recipes is not responsible for any miscalculation or misinformation in the nutrition label.
More recipes you may like...


Follow us on Social Media!
Save this recipe to your Pinterest!


Julie Kerr says
My test batch of these melted. I substantially increased the amount of corn starch and also added some gluten free all purpose flour, so the drybingredient was nearly doubled. Then they turned out perfectly.
Lilian Vallezi says
Hi Julie!
Thank you for sharing your experience! Adding extra dry ingredients can definitely make the dough firmer, but it isn’t actually necessary for this recipe. Because this dough depends a lot on the butter’s temperature, it can spread if the butter gets too soft. To prevent this, I’ve now made a short chilling time a mandatory step in the recipe. Just refrigerating the dough for about 20–30 minutes is enough to keep the cookies from spreading without needing to adjust the ingredients. I’m so glad yours still turned out well!
Lilian
Andrea says
Not sure what I did wrong but the mixture never turned into a dough, it just stayed a cream.
Lilian Vallezi says
Hi Andrea!
This mixture always forms a dough, so if yours stayed creamy, it’s likely that the ingredients weren’t measured accurately. You may have accidentally added too much sweetened condensed milk or not enough cornstarch.
Hope that helps.
Thanks,
Lilian
Theresa says
I followed your instructions perfectly and mine came out completely melted. It seems there must be a missing ingredient, like baking powder or something. Maybe a video would help? Maybe your ingredients are different than in the US. If you are thinking this could work for you, just don't. Skip it.
Lilian Vallezi says
Hello Theresa!
Sorry to hear your cookies melted! It’s likely because the butter was too soft or the dough warmed up too much before baking (sometimes for handling it too much). To fix this, try chilling the dough in the fridge for a few minutes before baking. My 11 year old makes this recipe all the time by himself following these tips, and it always work.
Hope that helps!
Att.
Lilian
Cadia says
Sooooo, my cookies went flat. Is that because of it being hot before I put them in the oven?
Lilian Vallezi says
Hi Cadia! I'm sorry yours came out flat. Yes, it's probably because your butter was softer than it should be, or the dough got too warm before baking. If it's warm where you are, or you worked the dough too much with warm hands, the cookies will spread more in the oven. To avoid this, you can put the dough in the fridge for a few minutes before baking.
Hope it helps!